

Before this project I had already been communicating my photography on Instagram, but I had never heard of word press. I also already followed a few photographers and photo editors on Instagram.
During this project I have improved my composition techniques and have gained confidence in using a variety of these techniques in square format. I now know that quality square format images were originally only possible if you were to use expensive medium format cameras like the Hasselblad. Nowadays it has become a popular format thanks to digital cameras and Instagram and has led to a revival of the craze of Lomography. I am looking forward to experimenting with my Holga120n and Sprocket Rocket and some art film, but I haven’t had time yet.
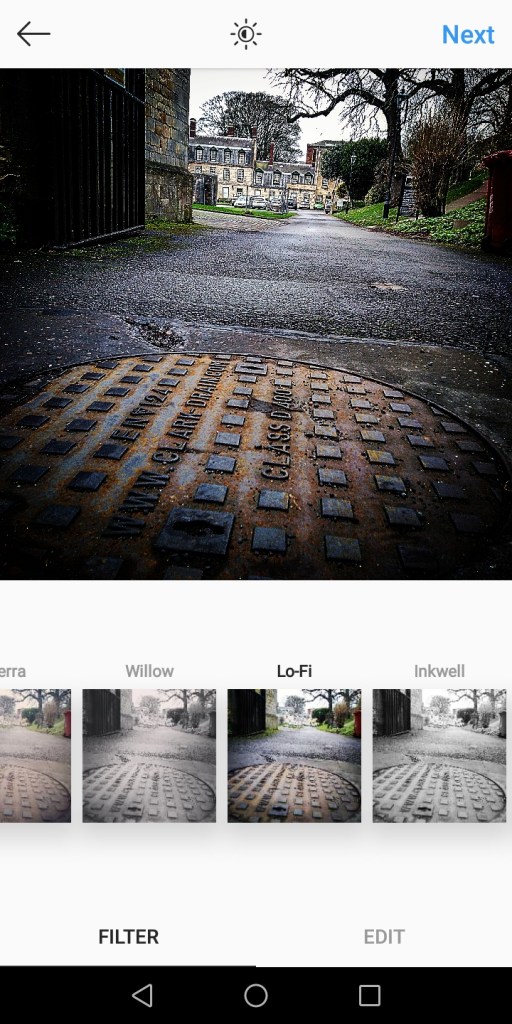
Throughout the project I really tried to make sure my Instagram images were quality images. I experimented with the different compositional techniques and genres and made sure that I chose interesting subjects. I did this because I thought it was important to show my best work. I tried out some filters and now understand that they can improve under or over exposed images or you can also use filters to change the mood of the image by altering the tone and the colours. Some filters alter the lighting of the image to create an atmosphere. I chose not to use filters for quite a few of my posts because I wanted the moment to be pure and was happy with quality of my shots. According to research no filter is the most popular. I think that I could have received more likes and followers by using more #’s. apparently the most effective a mount of #’s is 11 but Instagram allows up to 30 and you can hide these in the comments.
I found WordPress easy to use as a starter website. It was quick to set up a blog and start sharing information and images. I did not get many likes on WordPress, but I did not link it to my Instagram profile which could draw more attention to my site. Also, it could mean that WordPress gets more likes over time. I think it is important to use key words in the titles of blogs so that when people search your blogs are easily found. I was quite pleased with the layout of my home page I rearranged it so that all my posts are hidden in a drop-down menu which was influenced by the photographer’s website research. I added some of my favourite images to the home page to attract attention. I also changed the background colour of the pages to make it look more professional I have been fairly pleased with how my website looks but would have liked some more time to work on it.
Overall, I enjoyed posting my photography on Instagram because I received more followers and likes, and it was easy to use. Now I have used WordPress I plan to try and create a quality website over time but may use Square Space instead or pay to access the better themes on WordPress. I have learnt that to communicate both information and images successfully it is important to use a combination of Instagram posts to attract attention which is linked to a website to allow you to communicate more technical and background information.

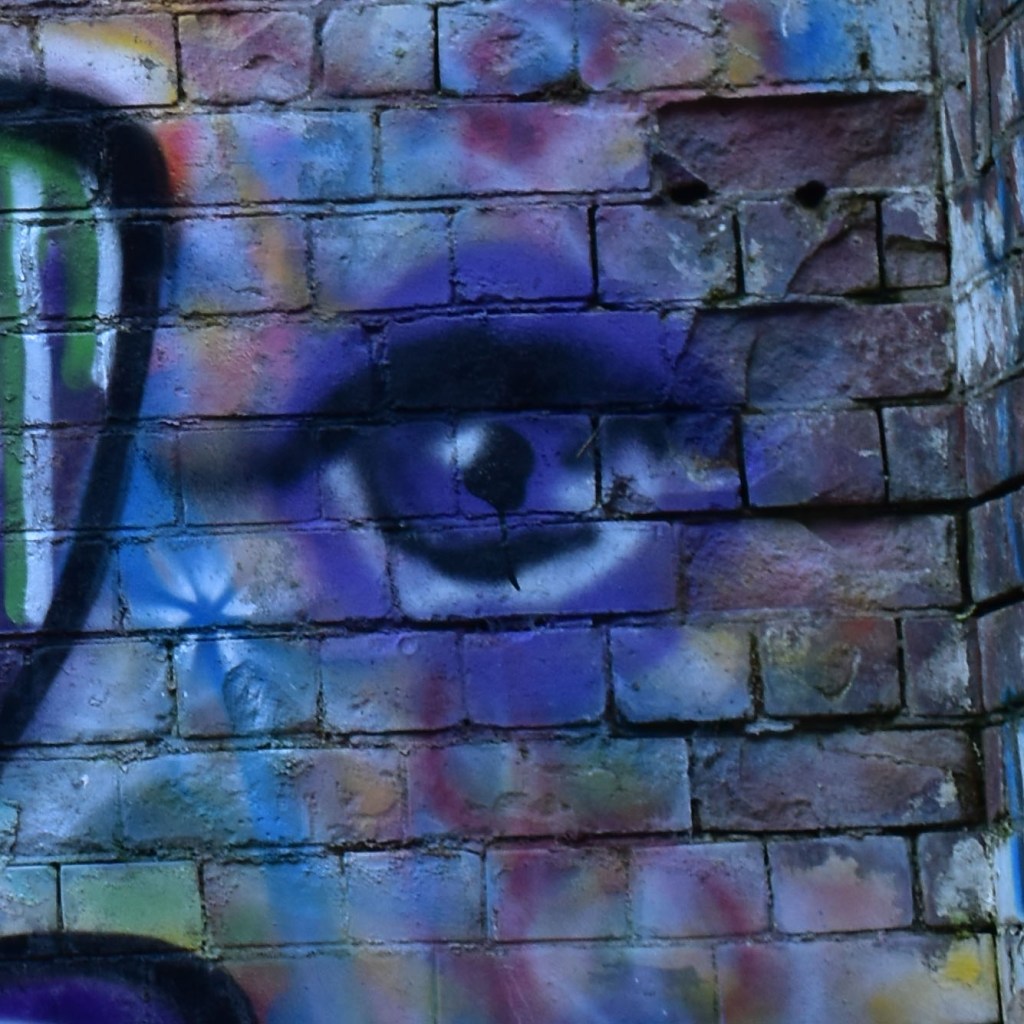
This image was taken in square format on my smartphone. It is part of the graffiti wall at college. I have centred the subject. The image has a background of geometric squares and rectangles created by the brick wall which are juxta positioned with the circular shapes of the eye. The colours are vibrant. This shot sends a creative urban message to the students at CHT. The way that the shot has been taken almost creates the impression of a face by cropping part of another piece of graffiti on the wall.

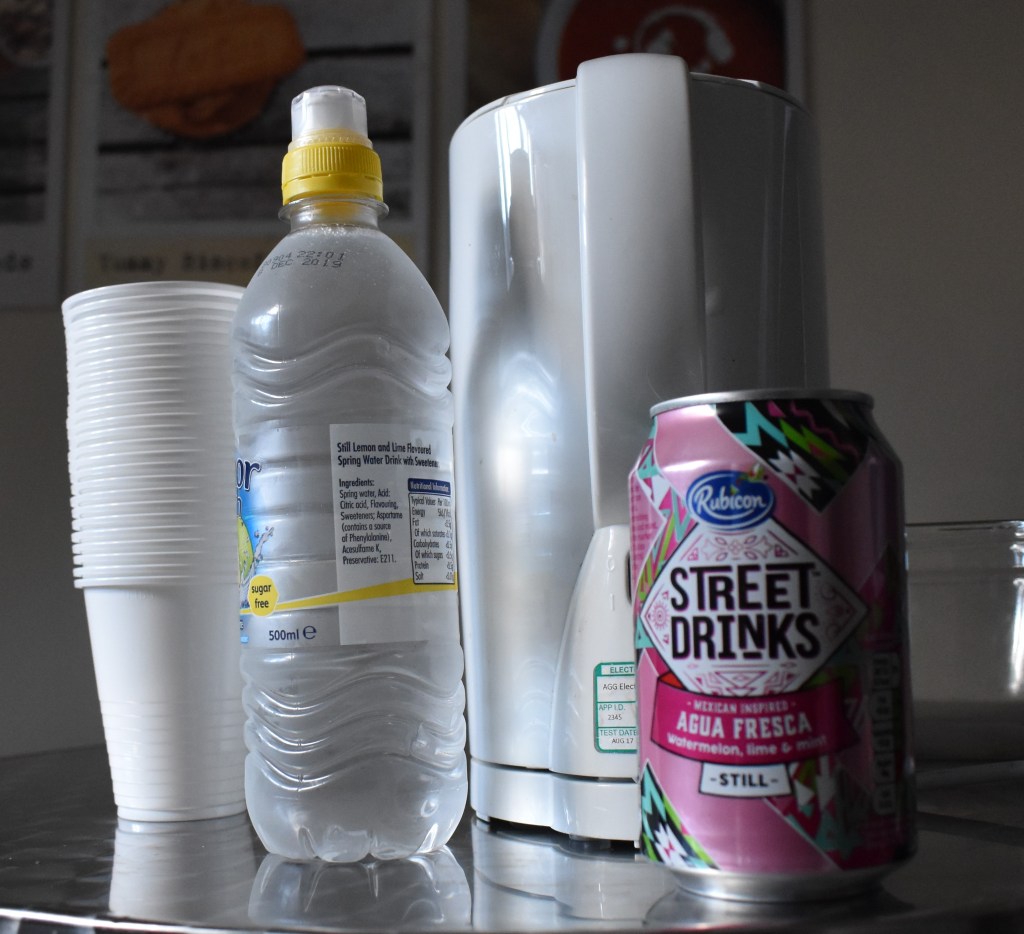
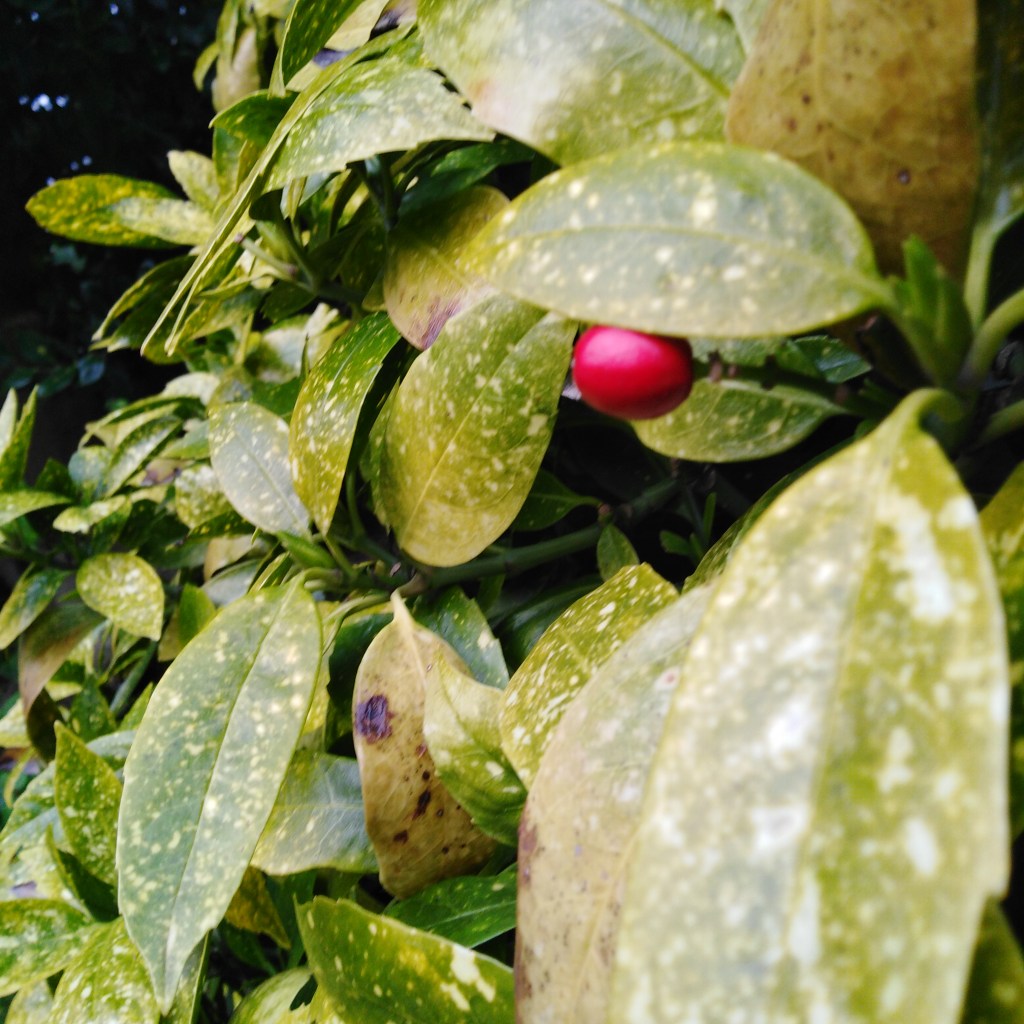
This still life image was taken at college on my smart phone. I arranged some everyday items on the canteen table. The image was taken from table top level. The still life arrangement fills the frame well. The room was well lit from the window on the left of the image.The image also has reflected light from the metal table which adds interest to the shot. The viewers attention is drawn to the pink can because the other objects are white and silver.
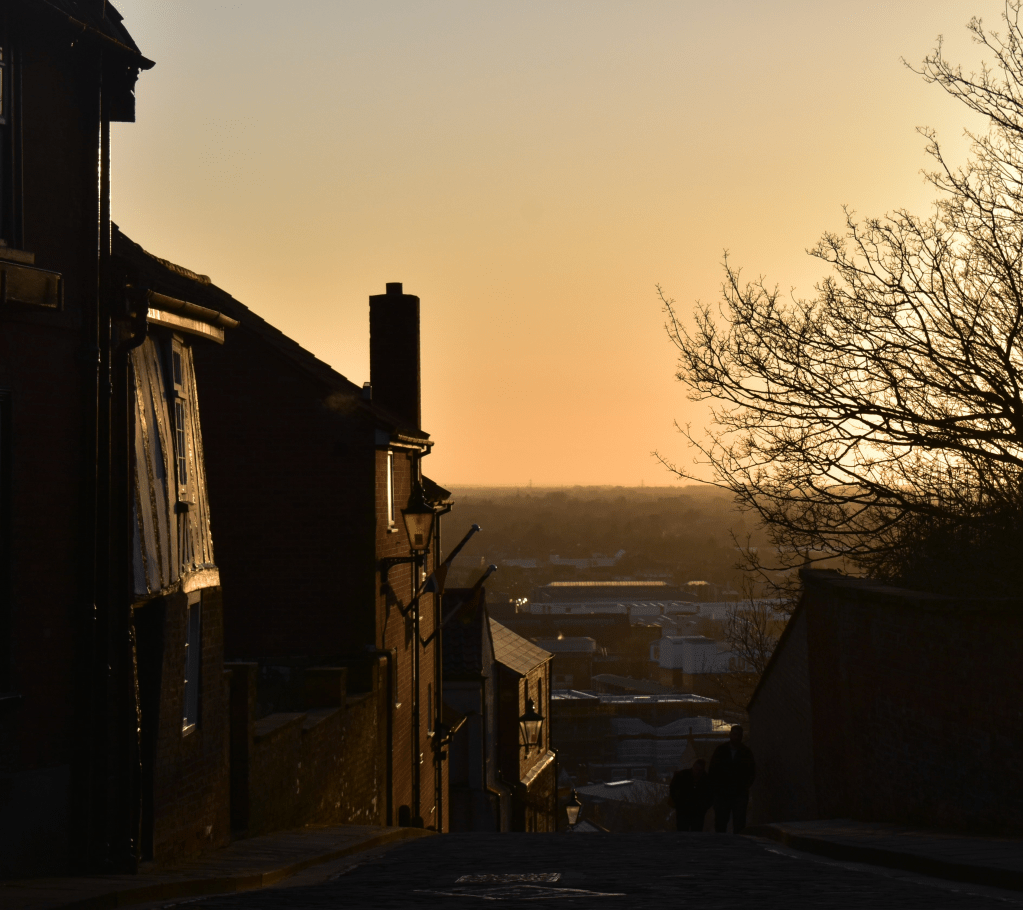
This image was taken at the end of the day. I wanted to capture the warm tones of the sunset to create a homely atmosphere. The image was taken on my smartphone. The image uses leading lines drawing the eye to the direction of my journey home. The image also has negative space created by the sky which also forces the viewers eye down towards the hill.
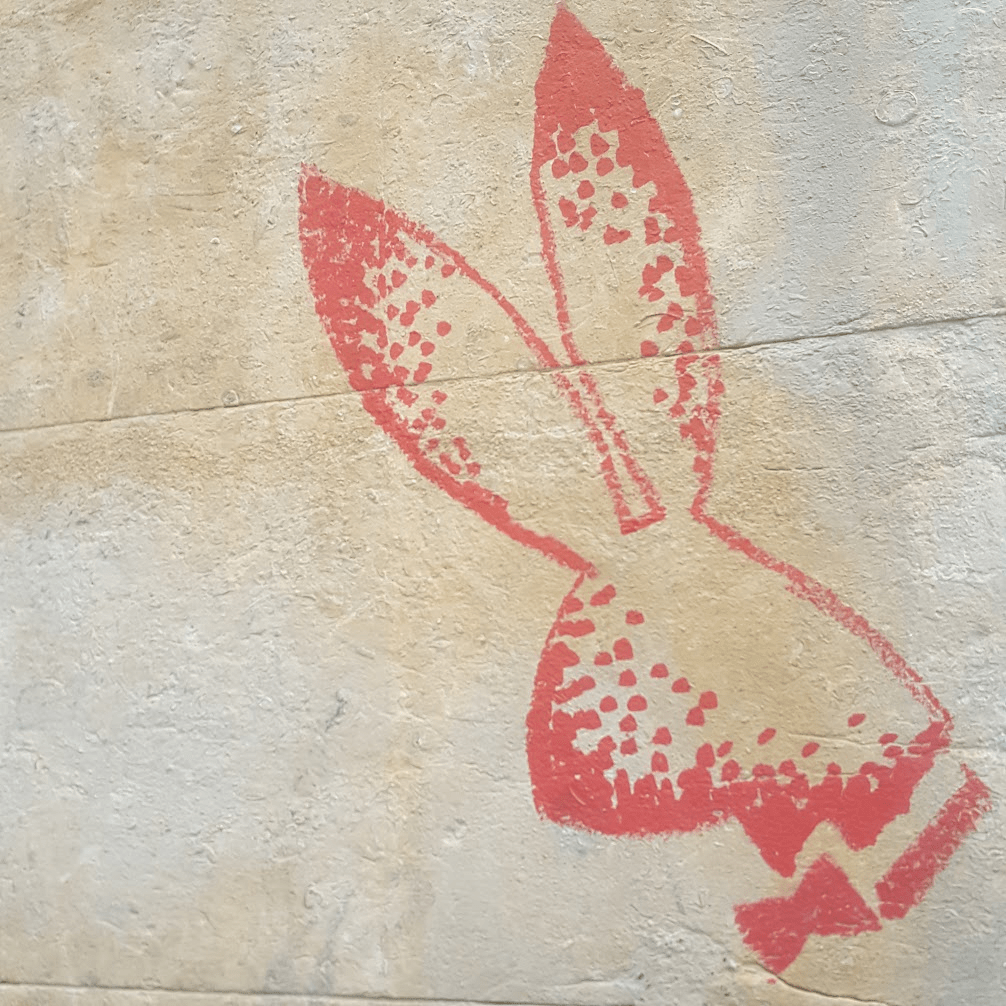
In this image you can see the negative space on the left hand side and there is a little bit in the top right. This is a simplistic image because it only has two colours. The image travels across the frame diagonally from the bottom right corner which works well with the square format.
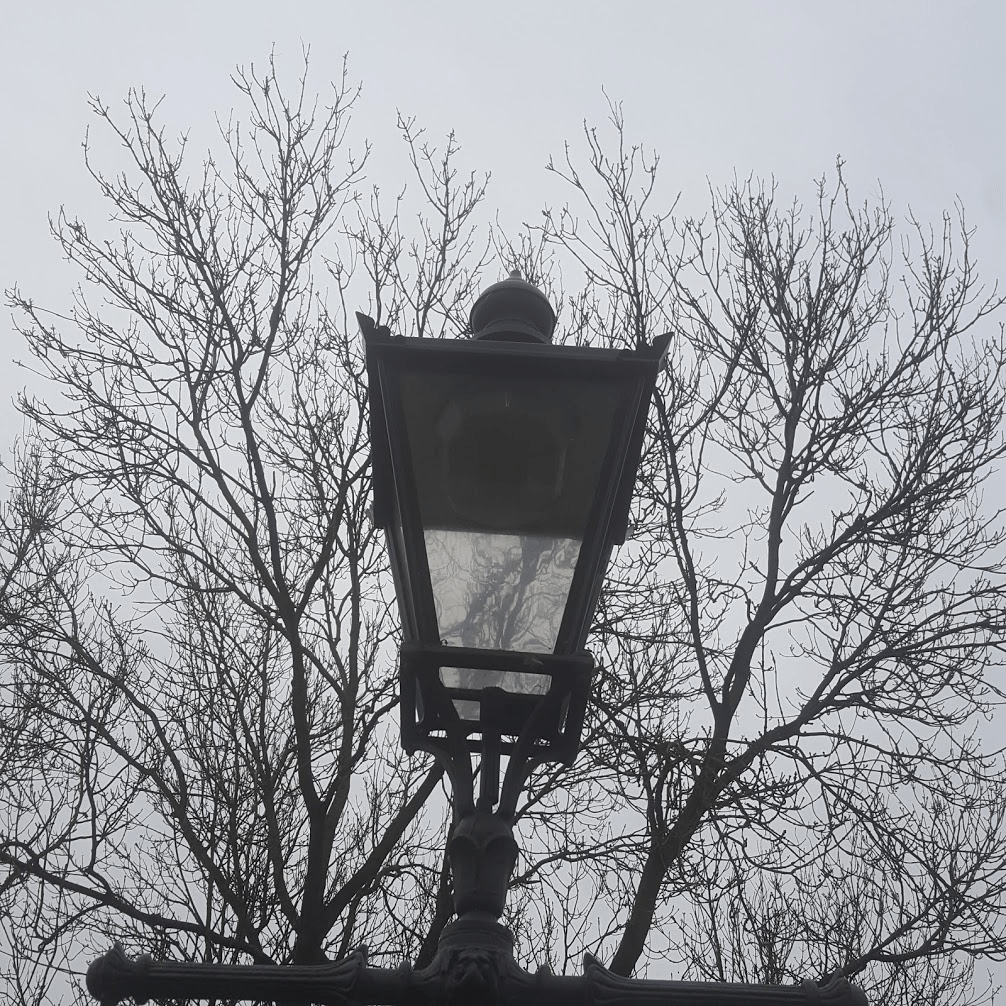
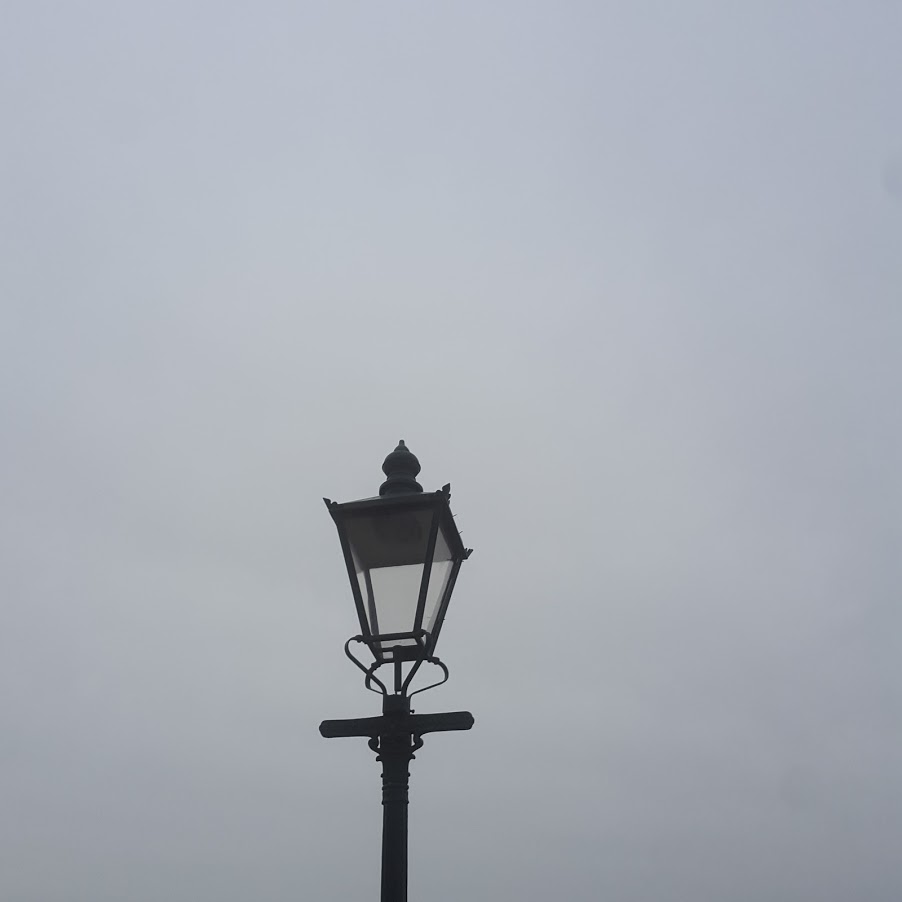
I have used the tree as negative space I think this is quite quirky. The image uses symmetry with the lamppost centred in the frame. ( the shot should have been a bit straighter to be more effective.
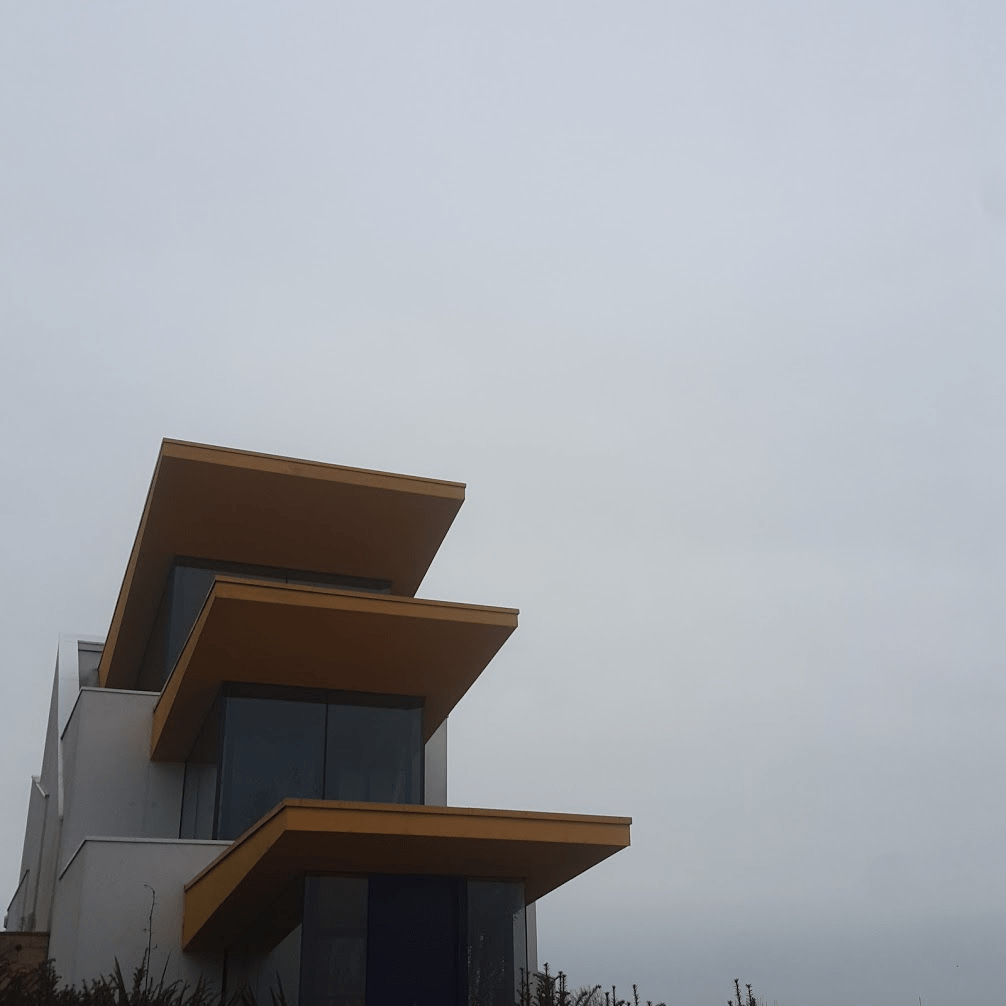
This image was taken in front of a house on the way to the bus station Im drawn to negative space on the right hand side of the image.
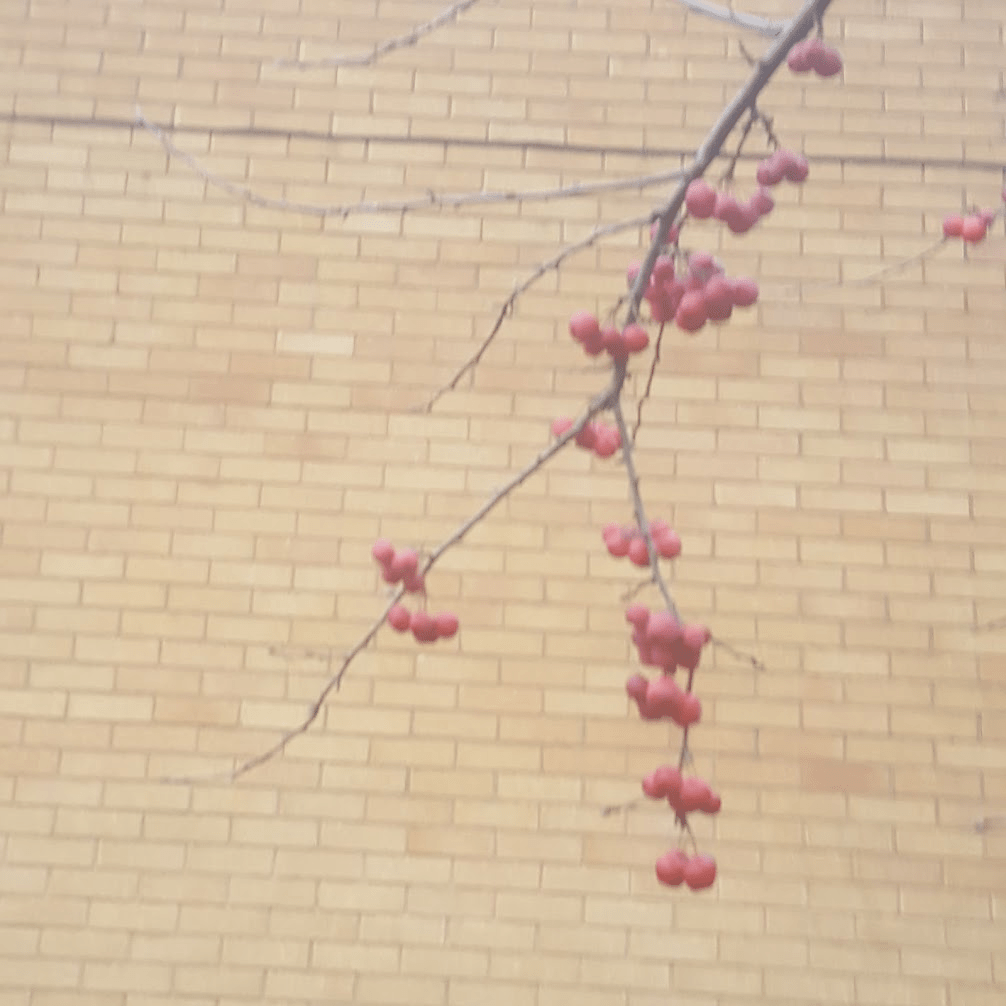
This photo was captured i think this has a good amount of negative space on the left and the right.
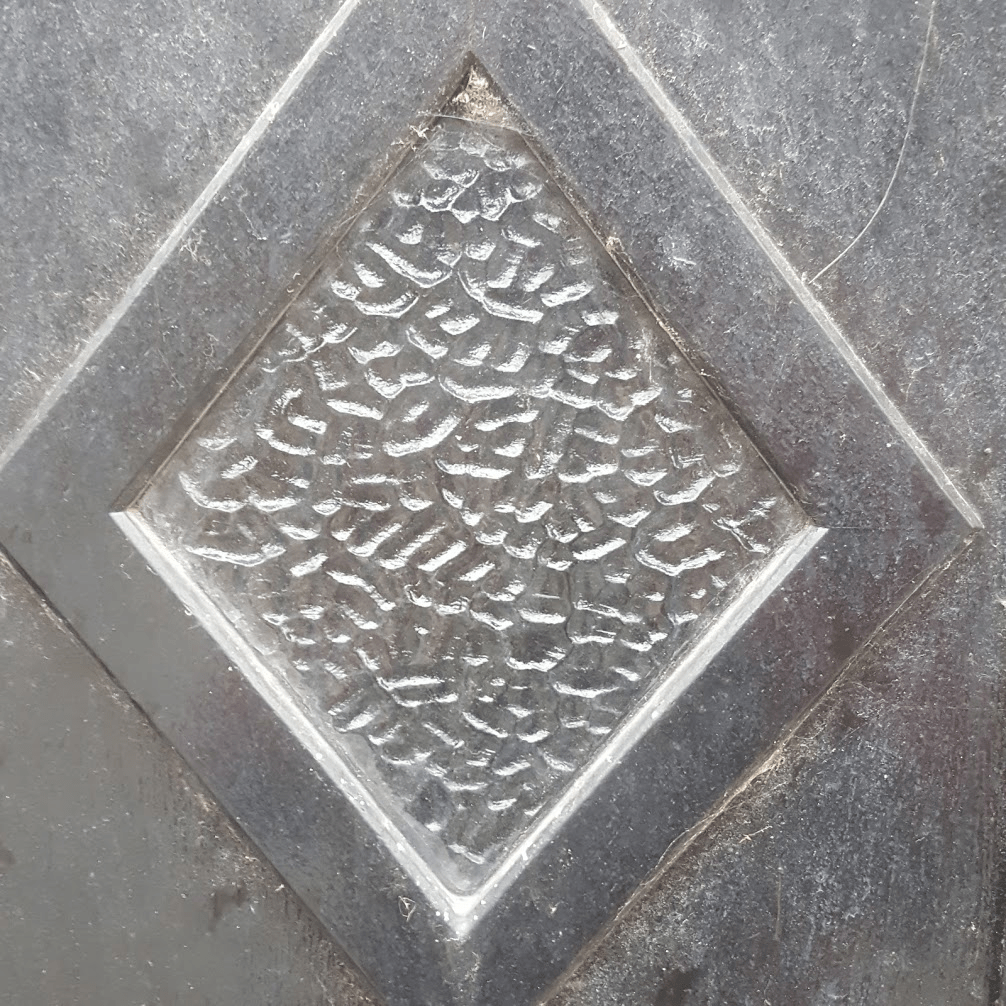
This image was taken of a glass in a door way and the negative space is going around the diamond.


Negative space makes the main subject stand out and makes him/her look alone.
Jomayra Texeira
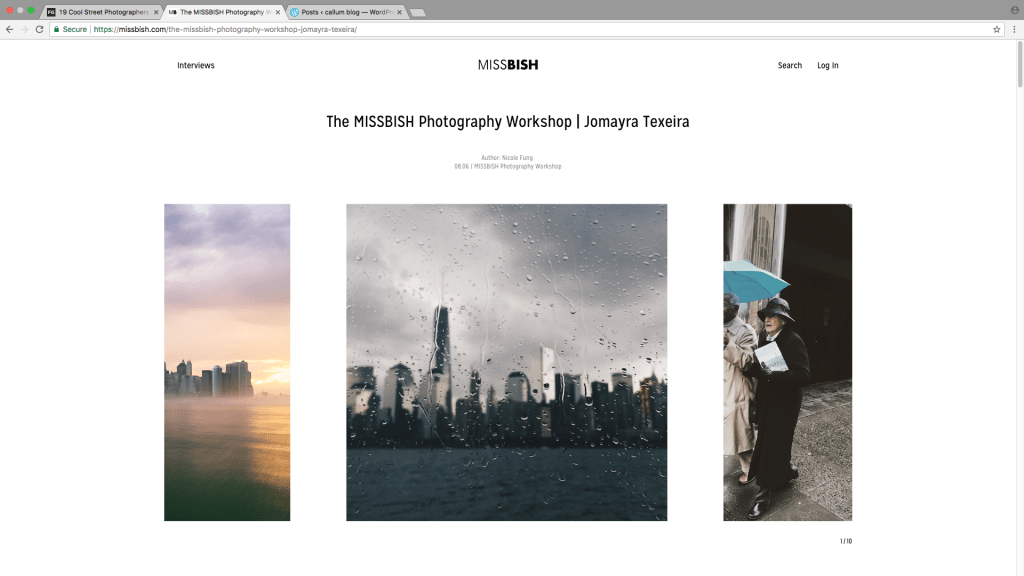

You can also find out a lot more information about the photographer. Its quite easy because its all on one page and I like this because it is basic it also says where he is based it even says about what equipment he uses which is really use full to up coming photographers or if you are already it could be quite useful to see what he used because you might want to see what lens he has used or what camera setting.
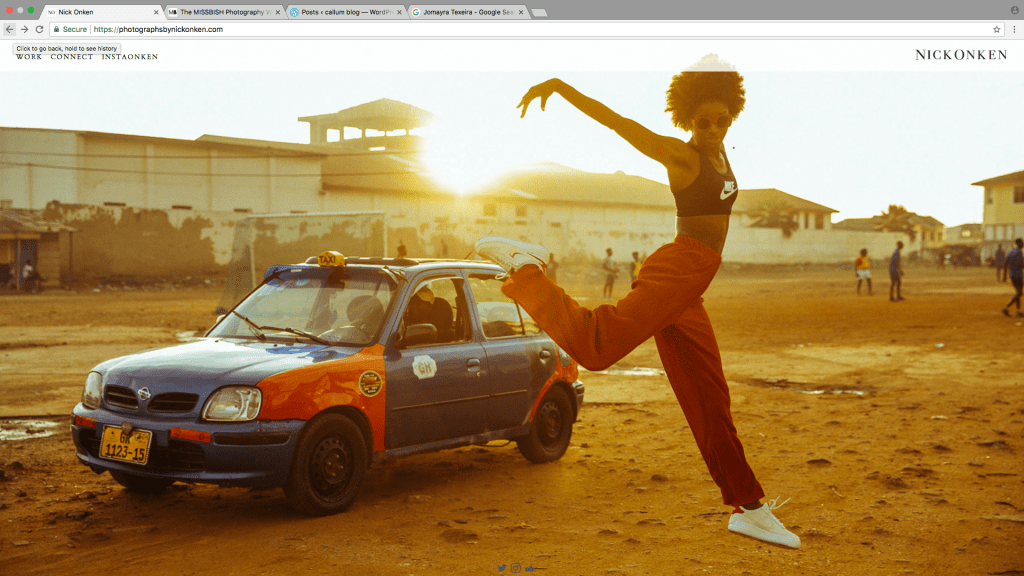
Nick Onken
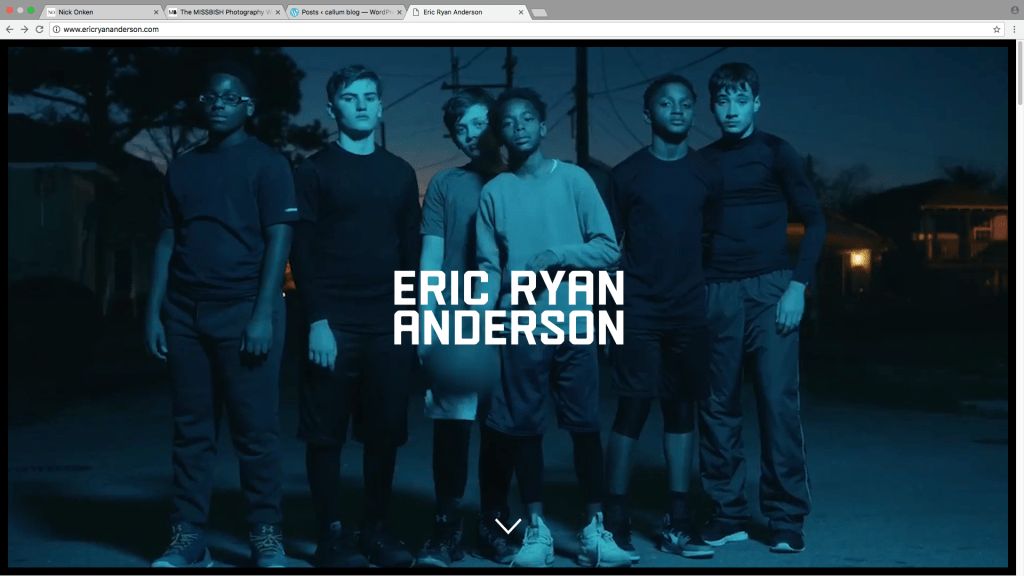
Eric Ryan
This website inspires me because of the way it shows of the images I think it was handy to be able to click the image to view more of the same subject and has them all clumped together and categorized. This layout is very simple to use I also think this website is not overly cluttered with information I think this is good because then it will stand out to a wider verity of age groups. I also like how they have hidden all the information behind the main page I think this is really cool because then you just get to see the repeated slide show of images.
Week 1

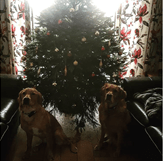
2. This shot is well balanced and uses symmetry. The tree is in the centre with a dog, sofa and curtain on each side. The image fills the frame. I took this image because I wanted to send a Christmas vibe. At first, I only used the college hashtag but later went back and added #golden retriever and #christmastree to see if I could create more likes.
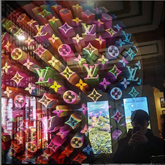
3.This image fills the frame well with a large spherical sculpture taking up most of the frame I took this through the shop window and captured my reflection in the right-hand corner. In the top right corner, there are leading lines on the ceiling which help draw attention back to the sculpture. I did not need to use a filter because I liked the colours the way they were. I used #blessed because it’s a picture of Louis Vuitton art instillation in the front of a shop window. I wrote #blessed as a joke as if I was buying Louis Vuitton. I now realise that if I had used#Louis Vuitton I might have got lots of interest from the brand followers.
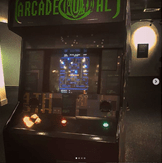
4. I took this image when I played packman on the arcade machine At the National Science and Media Museum. I wanted to communicate a retro vibe. I used the Aden filter to add to the retro mood. I used these # because it would draw more gaming people to the post. I think this post was effective in gaining interest and communicating my message.
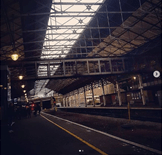
5. I captured this shot whilst waiting for a train from Huddersfield to Leeds. I took this image because there were lots of leading lines drawing the eye to the tunnel. The bottom left corner has negative space and the row of white lights also lead to the tunnel. The image makes good use of geometric shapes and lines. I took this image to communicate where I had been. I didn’t use a filter because I wanted to record a true moment. I just used #lcinstafamous. I think it would have been better if I had more interest if I had put #trainspotting or #Leeds. I will add these in the comments.
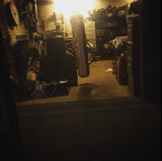
6. I took this image of my punchbag from outside the garage. The subject is in the centre of the frame. I was disappointed with this post because the image is not very clear. I think I should have used the Juno filter because it would have altered the blurry light at the top of the image. I think my hashtags were effective for this post and they communicate an inspiring message.
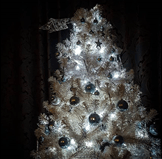
7.I took this image of one of our xmas trees to communicate a xmas vibe. The tree is in the middle of the frame and the lights keep the focus on the tree. I did not use a filter for this image. The #merrychristmas communicates the message behind my image well.
Composition Techniques When Shooting in Square Format
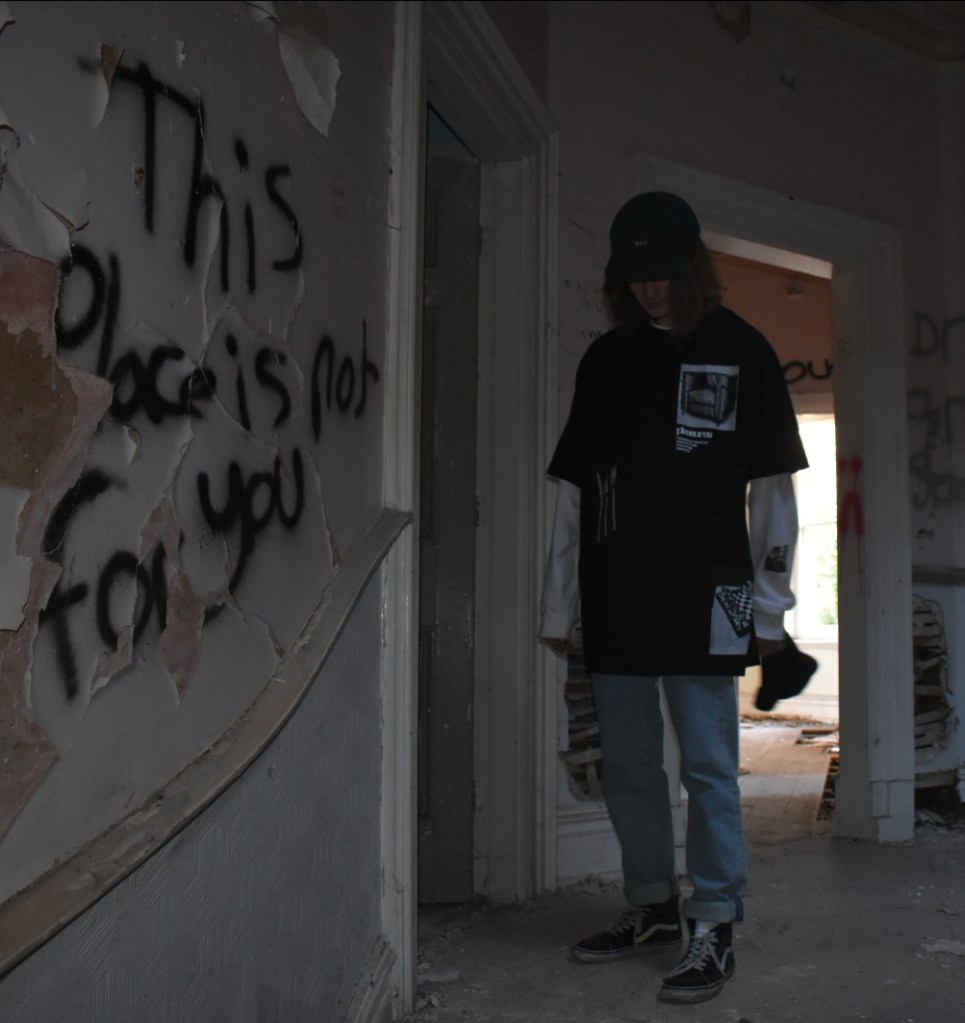
I like the way this image looks moody this is because of how dark this photo is. The graffiti creates a vibe like you’re not meant to be there and that it was a bad place. The door frames focus attention on the subject. This composition also has used diagonal lines to lead the eye to the subject with the wooden rail on the wall.
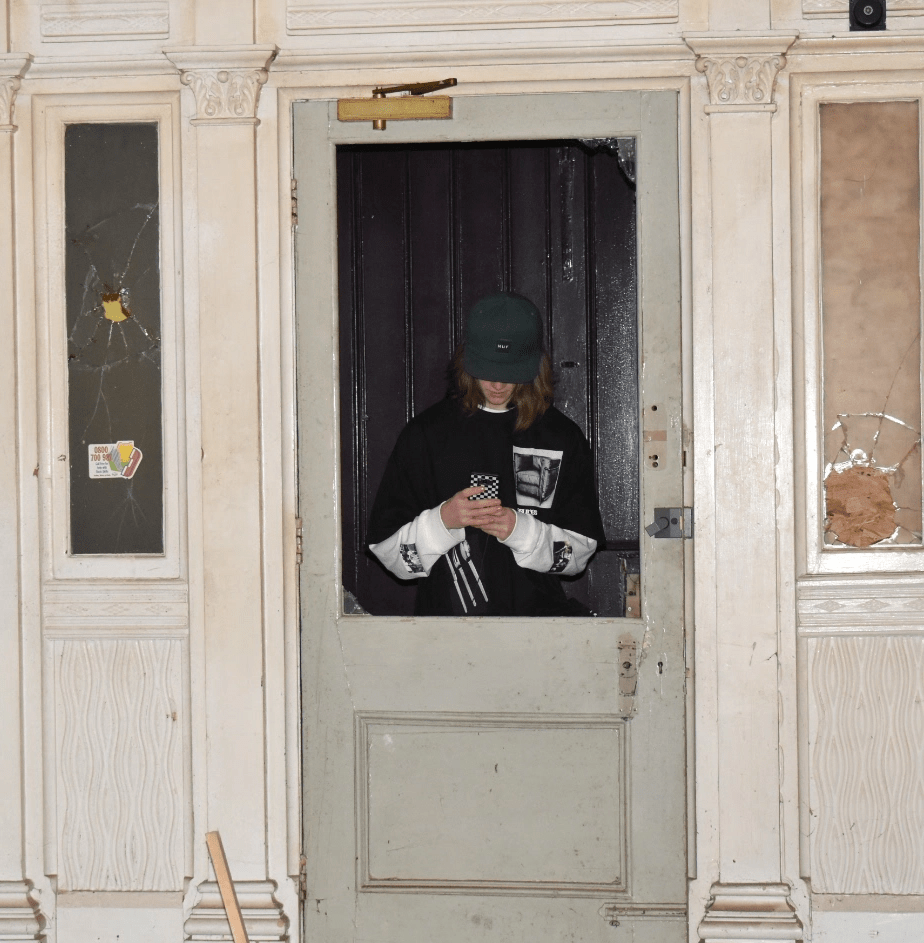
In this image I used the frame in a frame technique and had the subject in the middle of the image so that it becomes the main point of focus. This works particularly well with the square format. The image has repeated vertical lines. The colours are mostly pale shades of green and cream which contrasts with windows and the subjects clothing also drawing attention to the subject. This composition also uses rule of three with the three repeated frames. This image also has a lot of geometric shapes.
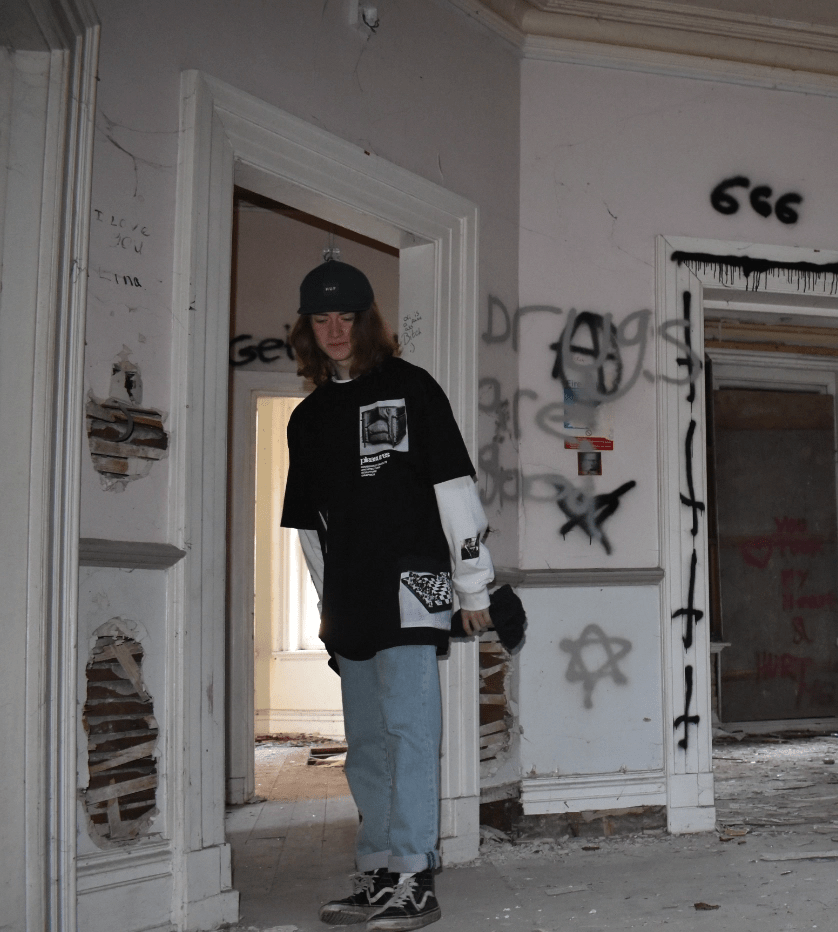
In this shot you can see that the graffiti has a really dark and eerie vibe. I say this because of all the upside down crosses and the 666 plus the stars. Its like someone was trying to summon the devil. This image composition uses frame within a frame. The colours in this shot are pale apart from the subjects clothes which makes the subject stand out. The lines in this image are mostly horizontal and the grey horizontal rail helps lead your eye to the subject.
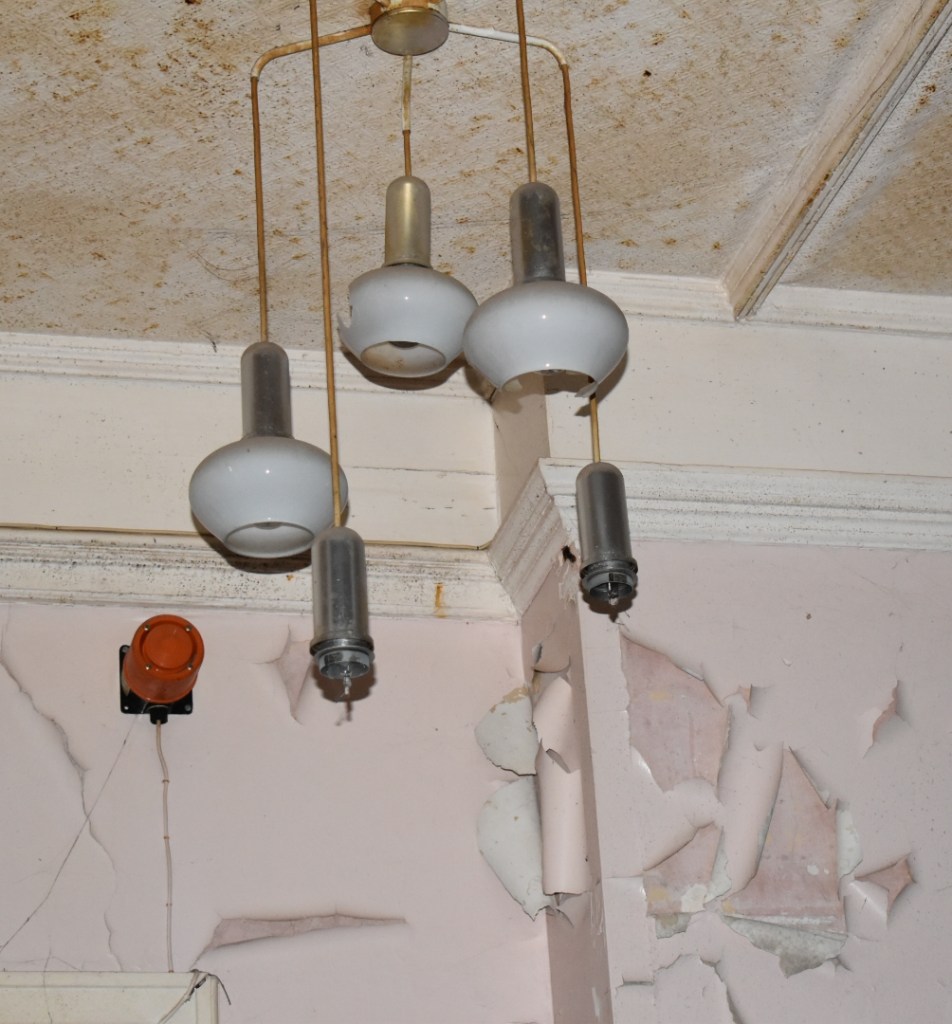
In this photo I like the way the image shows how torn down the building is with the peeling walls. I also like the way the lights dangle and look like they are falling to bits. This image uses geometric shapes and circles which work well with square format. The diagonal lines on the ceiling and coving draw the eye to the centre of the shot where the light fitting is hanging.
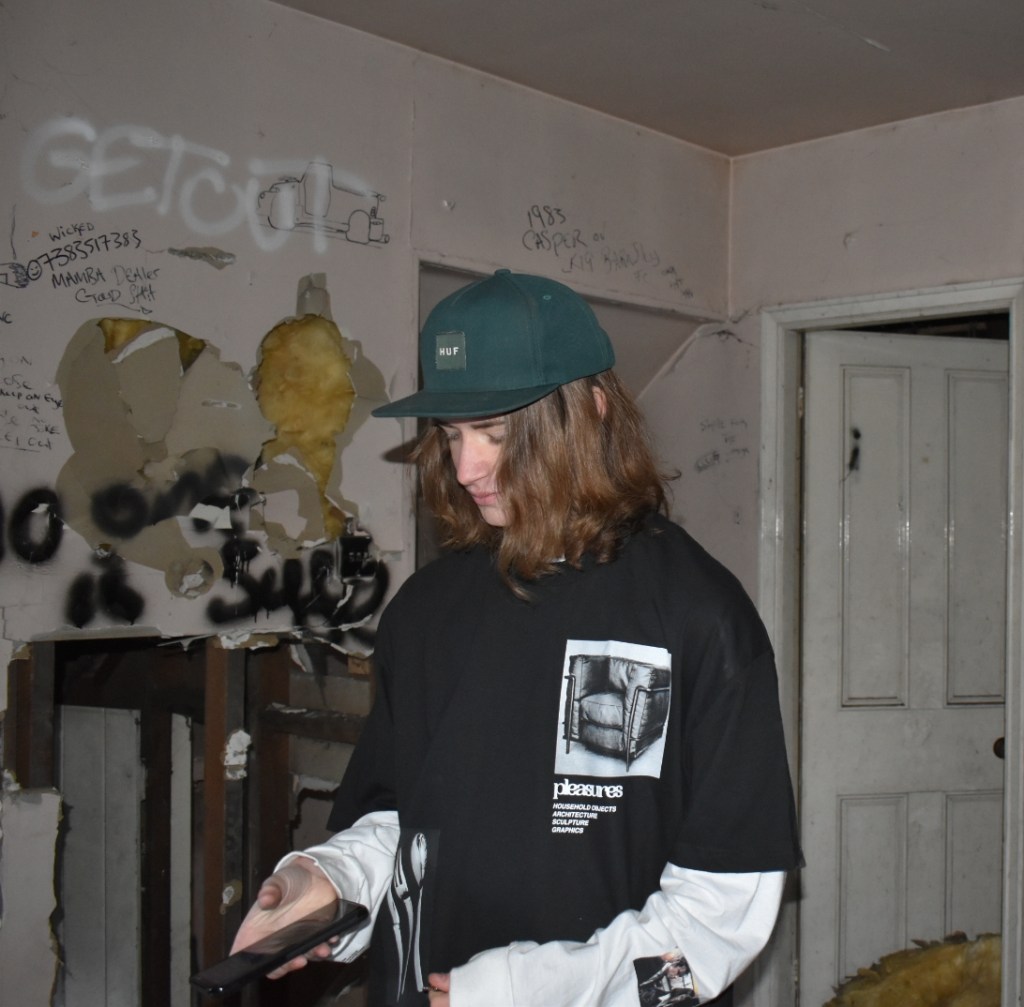
Here I have taken the shot with the subject in the centre. The eyes should really have been a little higher to be in the top third of the image but I still think it is an effective shot. The dark bold clothing of the subject works well against the paler background of the walls. The black and white t-shirt contrasts well with the busy textures and patterns of the derelict wall and graffiti. and the bold logo on the t-shirt really catches the viewers eye.

Here the image has a bold frame in the centre with three lines of rock attached diagonally to the frame which lead the eye to the subject. This shot also has lots of circles and rectangles on the cathedral in the background.

This image was taken in square format on my phone. The image fills the frame and makes use of diagonal line which draws the eye towards the dustbins. I took this image because the wall had interesting colours. This is the image without the filter. Its not easy to see the textures of the fence and the wall compared to some of the filters used.
This shot communicates a weekly event of dustbin day the image has a fairly warm feel.

The Mayfair filter makes the image sharper and shines a spotlight in the centre of the image. There’s a slight vignette at the corners. The details of the wall are sharper and the colours are brighter.
The Mayfair image makes the scene seem warmer and has given the street an edgy vibe.

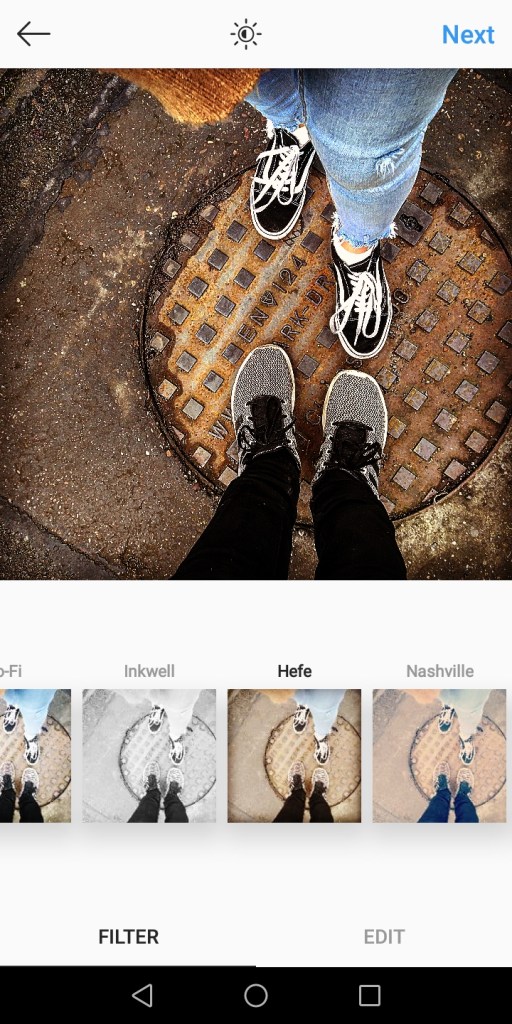
The Hefe filter makes the image much brighter. The colours are much brighter than the original image and there is also a slight vignette in the corners. The light is brighter and the shadows are darker.
The Hefe filter communicates a much warmer atmosphere than the original image.
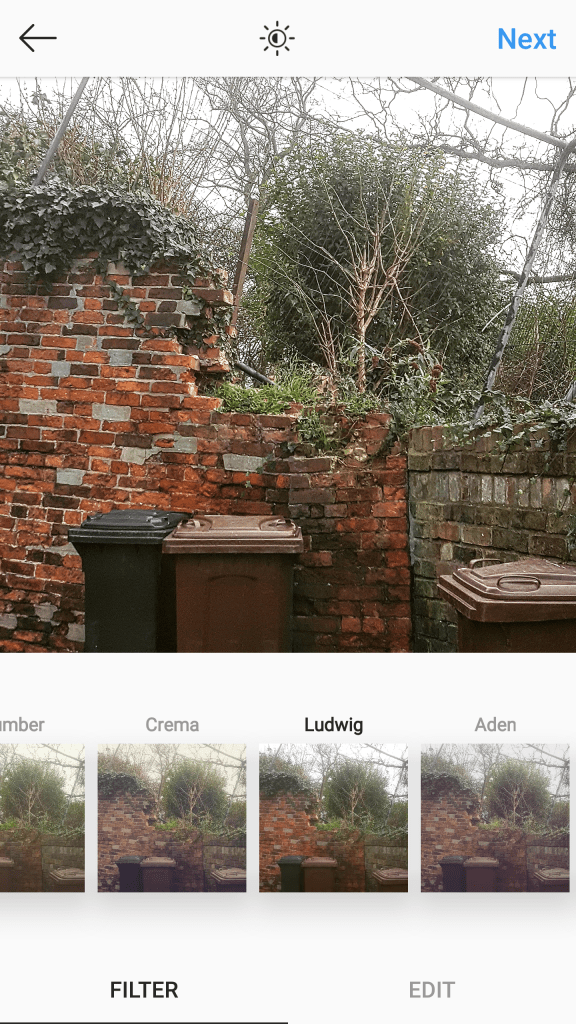
LudwigThis is the Ludwig filter I think this filter gives the image a cold and frosty vibe but it also brings out the colours in the wall.

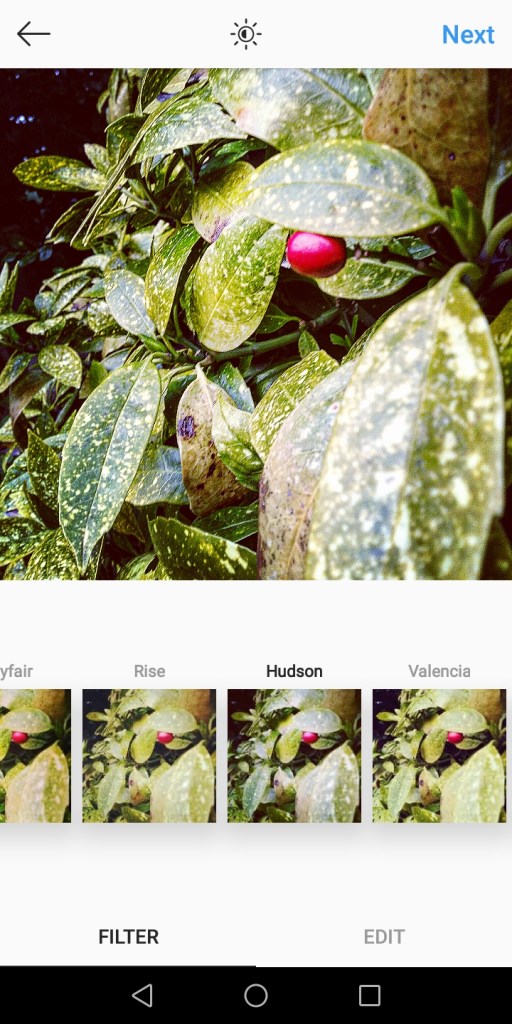
The above image uses the Hudson filter which makes the image seem colder. It has increased the blue tones of the green leaves making them appear darker and cooler the red brick wall is less vibrant.
I think the Hudson filter has helped create a winter vibe.
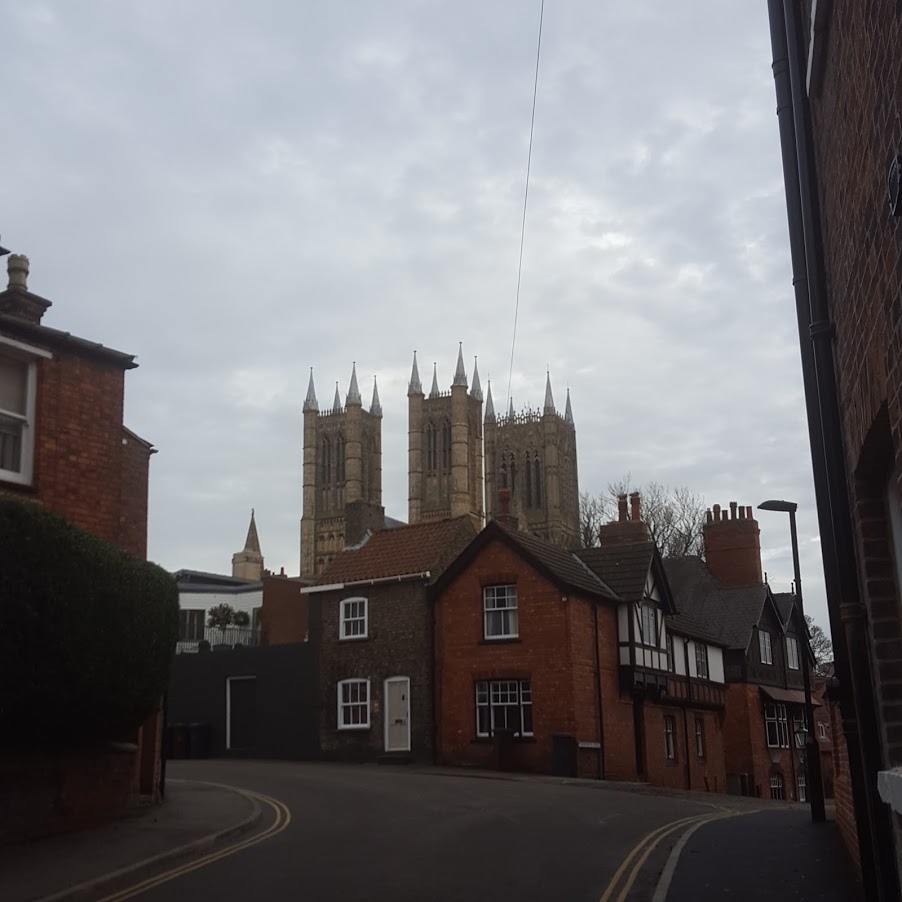
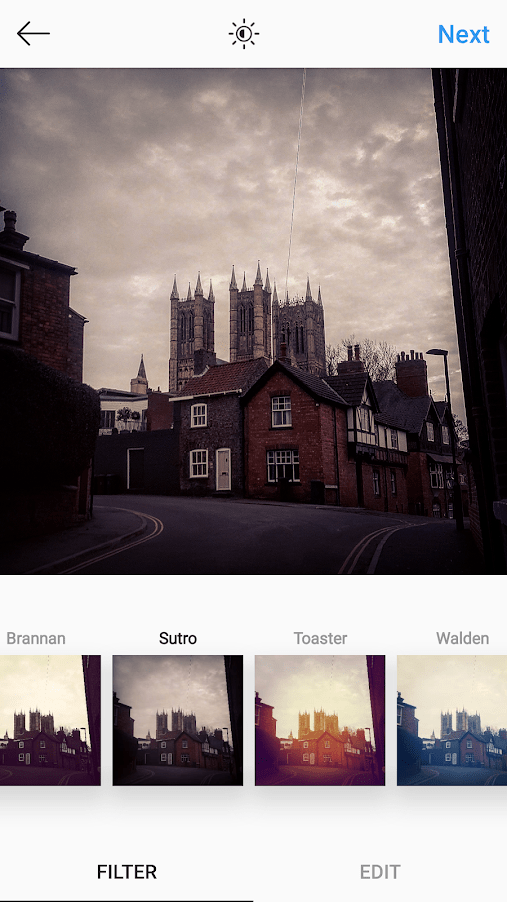
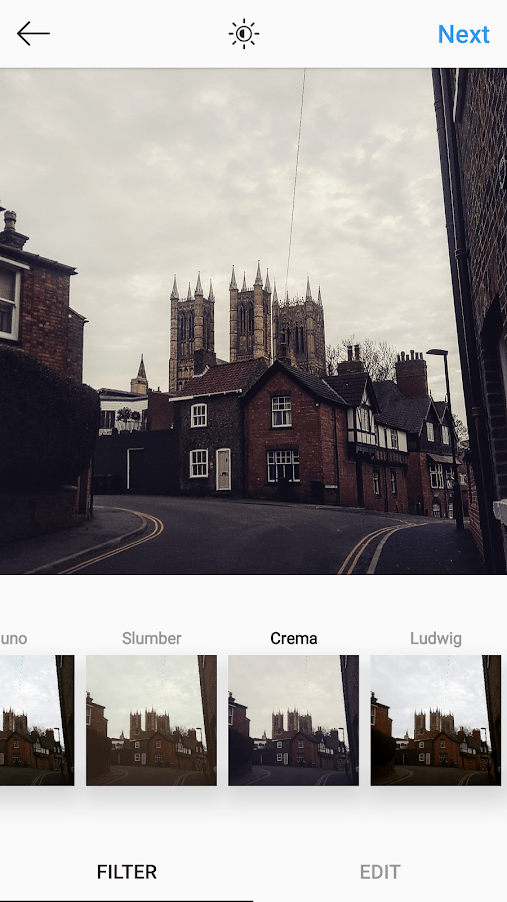
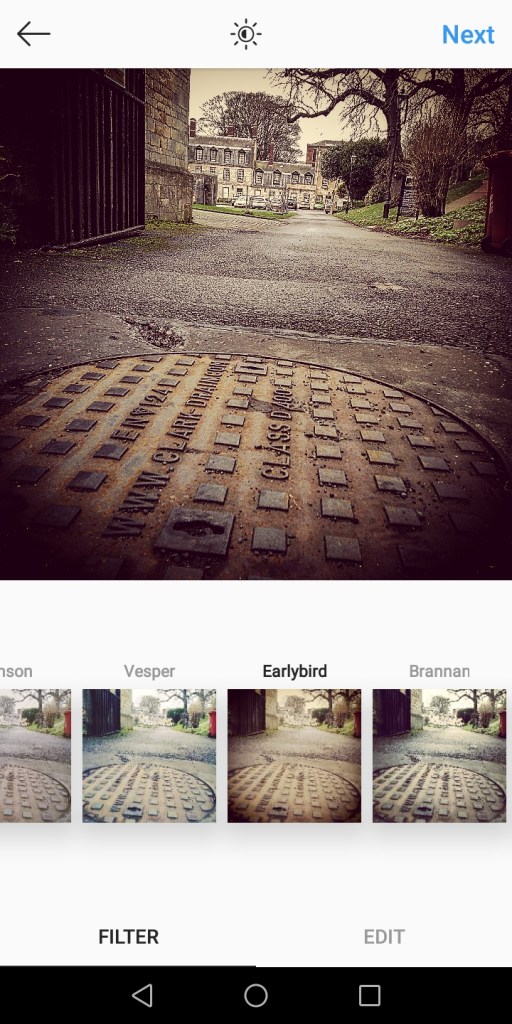
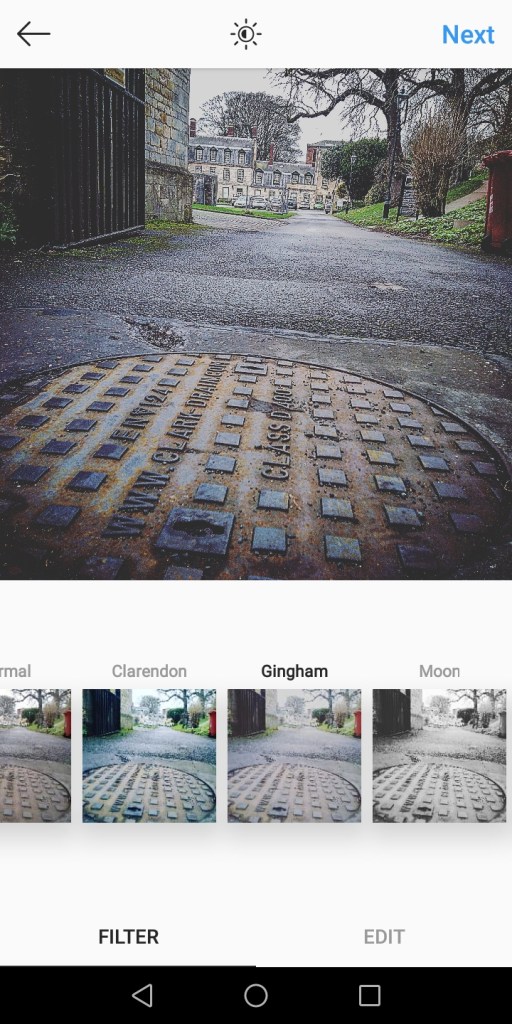
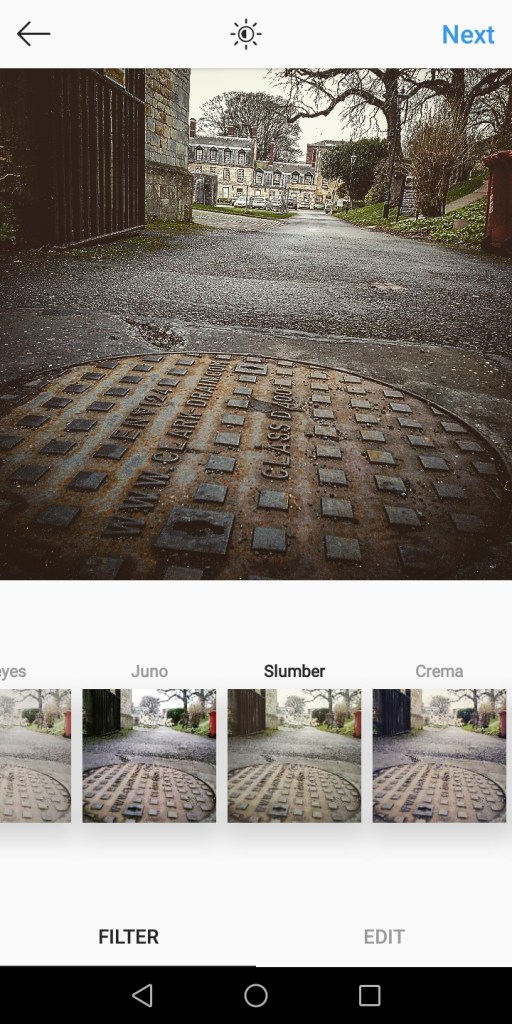
This image of the Cathedral was taken in square format on my phone it uses the road lines leading your eyes to the Cathedral. I also like the way the Cathedral is towering over the buildings
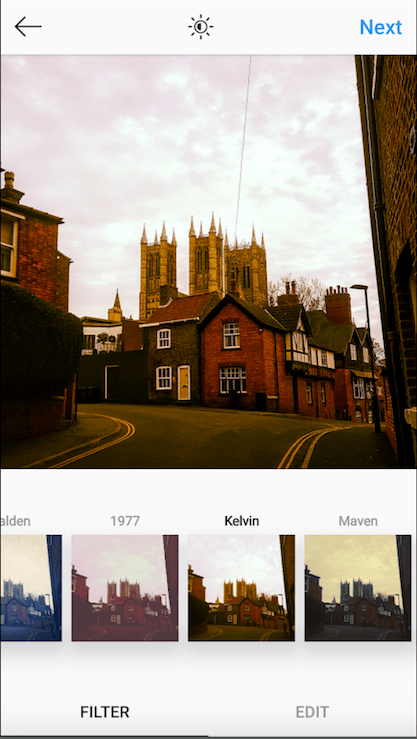
The Kelvin filter gives warmth to the photo. I also like this filter because it makes the photo look orange.This filter gives a warmer vibe to the photo.
This filter is good because it makes it look like its from the olden days I think this is cool because its like its gone back in time.
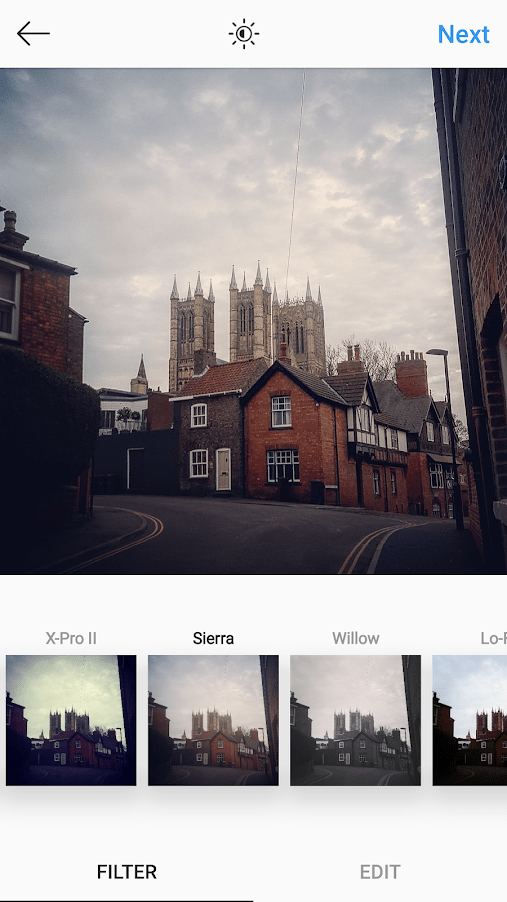
The Sierra filter makes the image lighter. I personally think this is a good idea because it brings out more colours and details especially if its an under exposed photo.
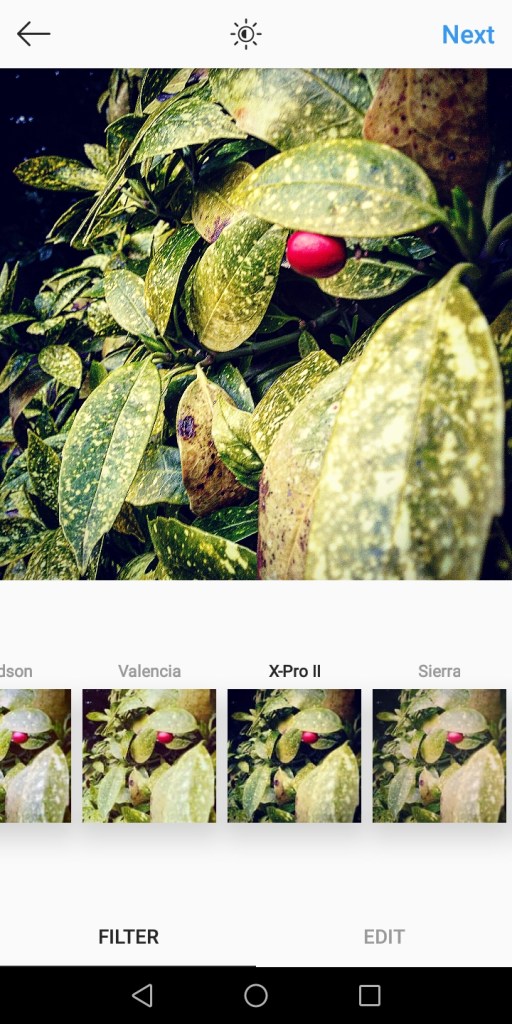
This filter adds a vignette around the edges of the image which draws your eye to the centre of the image. It is sometimes known as the hipster filter. It communicates a happy dreamy mood.
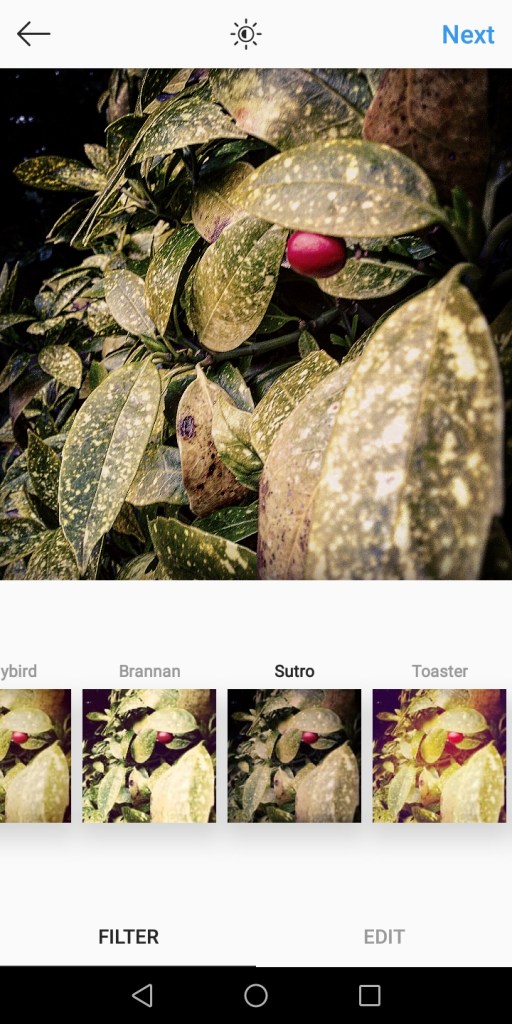
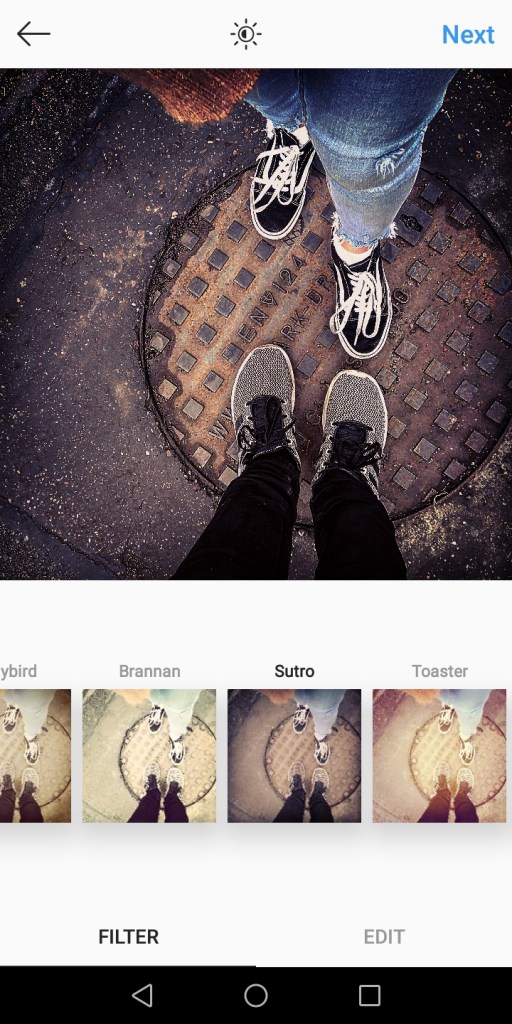
The Sutro filter adds a bold vignette and it makes the image really dark and dramatic. This filter emphasises the purple and brown tones and creates a sepia effect. I think filter communicates a mysterious atmosphere and draws attention to the cathedral.
The Crema filter makes photo look creamy and smooth. The Crema filter has made the sky look warmer on my image. It is known for working well with city shots. I think the filter has brought out the detail of the cathedral more than the original image. I think this filter communicates a warm olden day atmosphere.